How to Transform Your CRM Data: Connecting Power BI & Dynamics 365
Your company has finally made the jump to the cloud. Great, but now how do you use the data in your Microsoft Dynamics 365 cloud environment?
Table of Content
Your company has finally made the jump to the cloud. Great, but now how do you use the data in your Microsoft Dynamics 365 cloud environment? To report on all of the data entered into CRM by sales and marketing, you used to just hook up to the SQL database that is on the servers, import that data into Power BI, and start building. To connect Power BI and Dynamics 365, you must connect to Microsoft’s server over the internet.
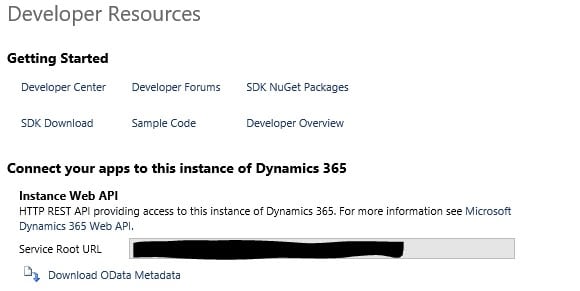
Step one in connecting Power BI and Dynamics 365 is to access your data using the OData connection string. This can be found in your instance of D365 under:
Settings > Customizations > Developer Resources > Instance Web API – Service Root URL
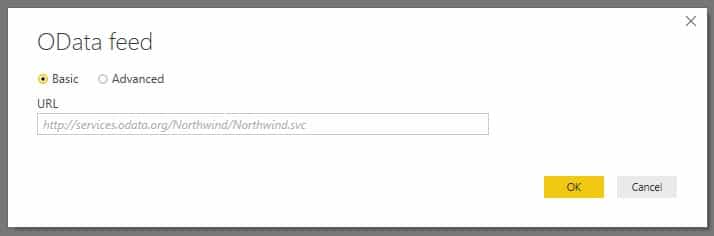
Then we take the D365 OData connection string and plug it into the OData connection in Power BI.
Get data > OData
Next, you will need to sign into your environment with your office credentials. From there, all you have to do is begin selecting the tables that you need and load them into the query editor as you would any other data source.
Now that we have pulled the data in from CRM using the OData connection string, we need to make some changes to the tables. The second part of this blog post will go over how to translate some of the CRM data so it is easier to read and take action on.
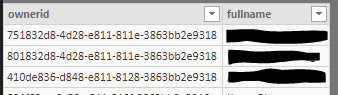
The first thing that you will notice when you look at the table is that there is a good amount of GUIDs. We will use these as the keys to connect tables. In the images below, we can see that I have brought in two tables. The ‘System Users’ table has the users name and information. I have also brought in an activity table. In the second table, we can see that under ‘_ownerid_value’ we have a GUID and not a name.
Next, under the relationship view, you will use the two GUIDs as keys to join the tables so you can easily identify who the owner is.

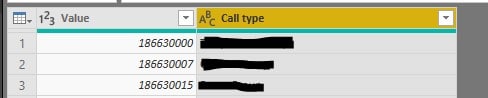
The next step providing proper English names for the options that are picklists in CRM. You will see these columns in the image directly above as ‘statuscode’ and ‘socius_phonecalltype’. One option is to replace the values with words column by column—this is not recommend because it adds multiple steps to your query and with OData queries, the goal is to eliminate inefficiencies.
The other, more efficient option would be to create a table with the values and the corresponding English words as shown in the image below. Then, you will merge the tables. You can set the newly created table to not refresh or load so that it will not affect your load times.
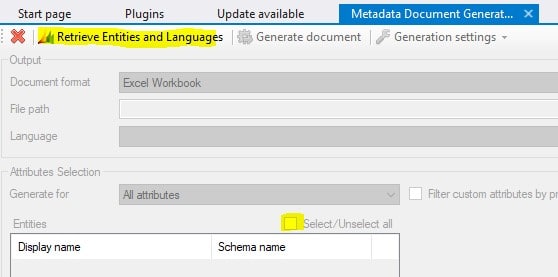
To access the options that represent the values in a pick list you will need a metadata file. This can be obtained from your CRM team or from an application like XRM toolbox. If you are going to use XRM tool box, the plugin is called metadata document generator as shown below.

From there, sign into your CRM instance and click ‘Retrieve Entities and Languages’ then ‘Generate document’. The document will be created as an Excel workbook with all of the information about the CRM data.
After you have made the connection and transformed the data, the next step is to start building insightful visuals and reports.
For more information on optimizing your reports or other Power BI features, contact our BI consultants today.
Talk to us about how Velosio can help you realize business value faster with end-to-end solutions and cloud services.