Technical Update Notice for BC Users Using Basic Authentication or a Web Access Key
Jillian Elliott||
Changes for Dynamics 365 Business Central that will remove the ability to authenticate using basic authentication or a web access key.
Table of Contents
SHARE
SHARE
Important update for Dynamics 365 Business Central Customers using basic authentication or web access keys.
For any cloud-based/SaaS implementations of Dynamics 365 Business Central, Microsoft will be rolling out changes region by region for Dynamics 365 Business Central that will remove the ability to authenticate to their services using basic authentication or a web access key. Moving forward, Microsoft recommends using modern authentication (OAuth authentication).
No changes are occurring to the authentication process for the on-premises version of Dynamics 365 Business Central; this affects online Dynamics 365 Business Central only. You can get the details directly from Microsoft..
If the legacy Dynamics 365 Business Central SOAP connection is used, those connections will need to be re-created and set up as an OData connection. Any integrations based on the SOAP connection will need to be re-created as well. If the OData connection is in use, the steps below can be followed to enable the new authentication method.
Our Client Account Management Team at Velosio is here to help – reach out to your Account Manager directly or email insider@velosio.com if you are unsure who your account manager is.
Steps For Setting Up OAuth 2.0 For Business Central SAAS Tenant Environment
The below is an example of configuring OAuth and testing it in POSTMAN. Addressing your specific application that utilized basic auth will be dependent on the specific application. Feel free to reach out to us on how to address your specific needs.
Log-in to Azure Portal using your Business Central log-in ID
Search for “App Registrations” and then click on New Registration
Enter some value in Name field as shown in screenshot
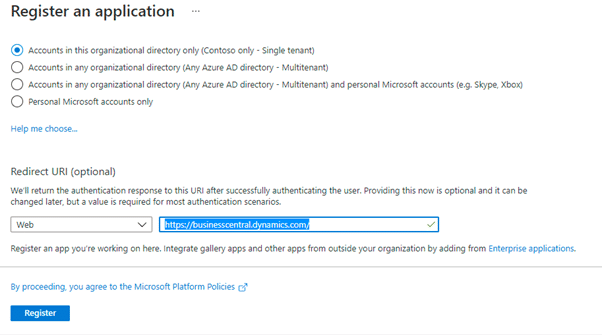
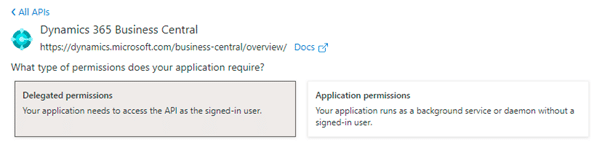
Please select the appropriate value from given 4 options for “Who can use this application or access this API?”. For example, here I have selected first option.
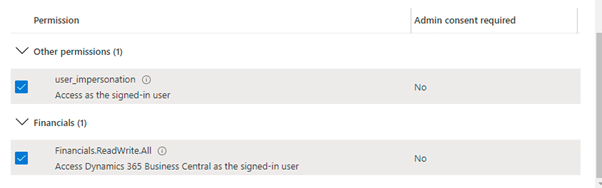
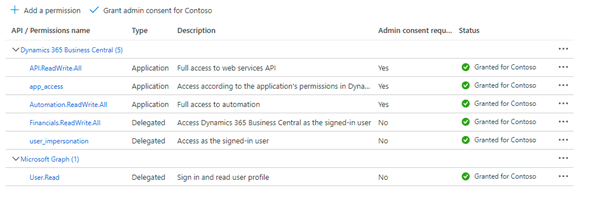
Then select “Business Central and then click on “Delegated Permissions” and place check mark (Boolean TRUE) in all lines.
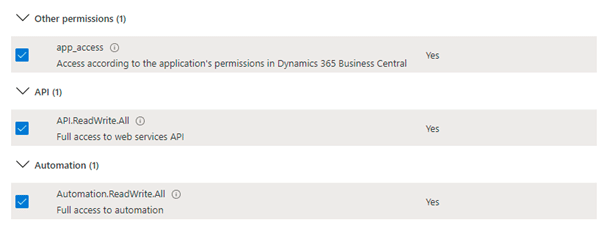
Then click on “Application Permissions”
Select all entries (Boolean TRUE)
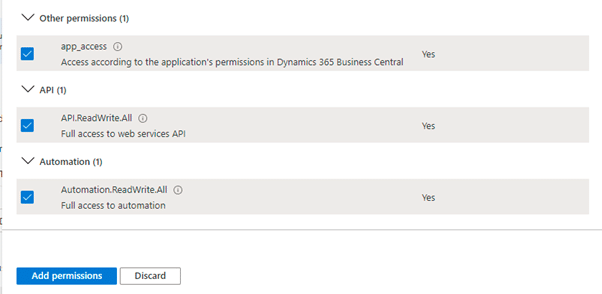
Click on “Add permissions”
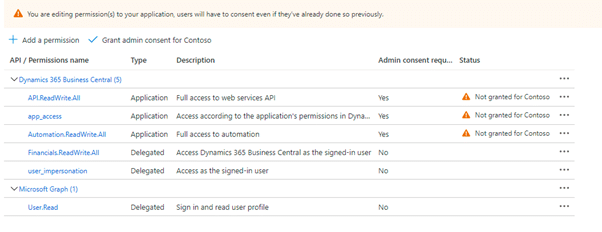
Next step is to “Grant admin consent to Contoso”
Click on Yes, as shown in next screenshot
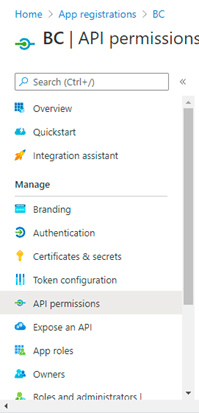
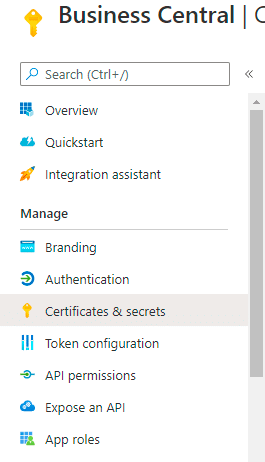
Navigate to “Certificates & Secrets”
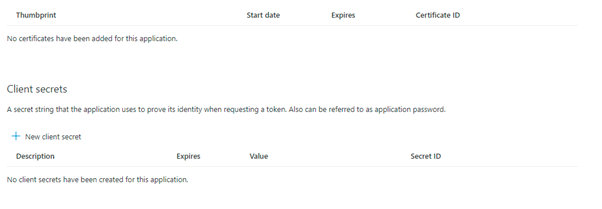
Click on “New client secret”.
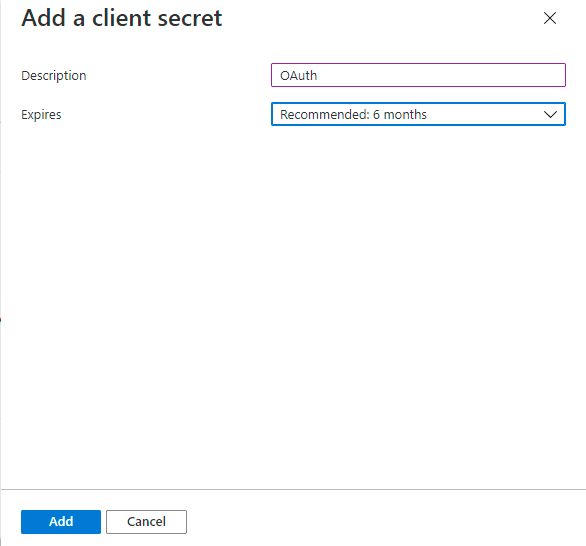
Add a client secret
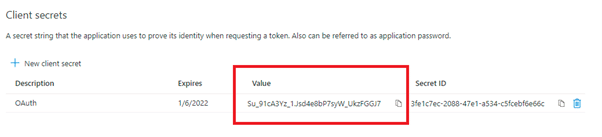
Very Important: Copy & save the value as shown in below screenshot, this will be masked later on and required by POSTMAN. In the below screenshot “Su_91cA3Yz_1.Jsd4e8bP7syW_UkzFGGJ7” is the “Client Secret” in the terminology of POSTMAN.
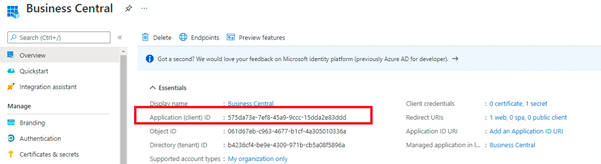
Navigate to Overview and make a note of Application (client) ID which will be used in POSTMAN.
POSTMAN Part:
Choose type as OAuth 2.0
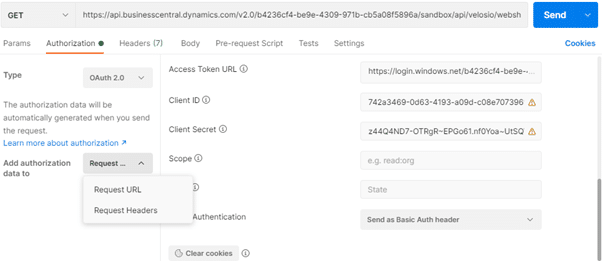
In “Add authorization data to” select “Request Headers”
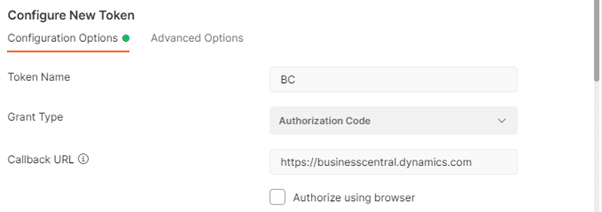
Click on “Configure new token”
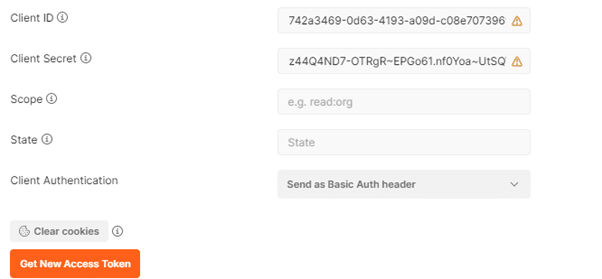
In “Token Name” enter the value that you entered while “App Registration”, example “Business Central”
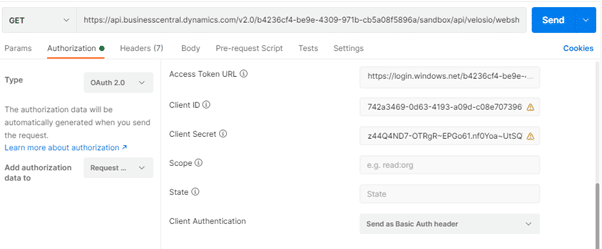
Client ID: Please refer to step 18 in the azure steps list, there it is “Application (client) id”, enter that value on Client ID field in POSTMAN.
For Client Secret, please refer to step 17 in azure steps list.
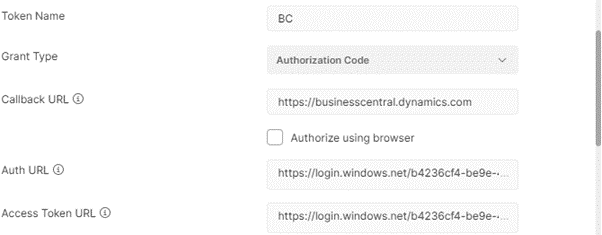
Keep scope and client values as blank and choose “Send as Basic Auth header” in Client Authentication and then click on “Clear cookies” and then finally click on “Get New Access Token”
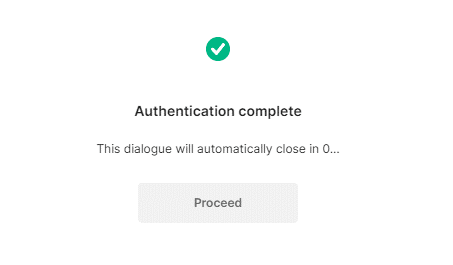
You should get “Authentication complete” message.
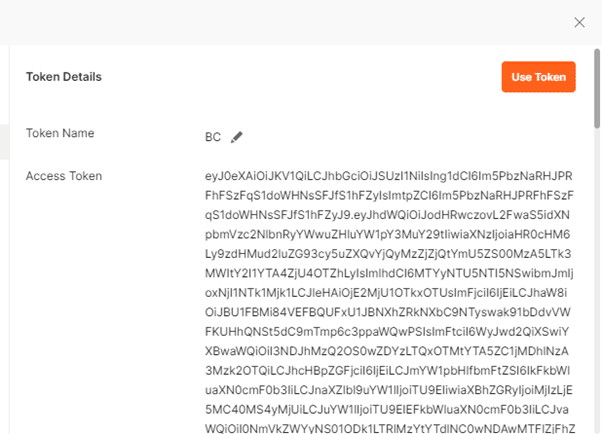
This token can then be used as a replacement of the web service key in postman.